Tuesday, November 1, 2011

Cloche Hat


Yarn: bulky, shown in Noro Nadeshiko #6
Needles, size 10 circs or DPN's
Size, Womans. (its kind of small though, if you want to make it bigger, increase 10 sts at cast on)

terminology:
CO: cast on
sts: stitches
k: knit
p: purl
k2tog: knit 2 together
ktbl: knit through the back loop.


Pattern:
CO: 100 sts, join in round.


R1: Knit around
R2: * k2tog, k8. Rep from * across(90sts)
R3: * k2tog, k7. Rep from * across(80sts)
R4: *k2tog, k6. Rep from * across(70sts)
R5: *k2tog, k5. Rep from * across(60sts)
R6: Purl across
R7: Purl across

Knit for 5-6 inches (Or however long your head is. The top of the hat decreases pretty flat so make sure the hat is long enough before you begin decreasing.)

Decreasing for top of hat
R1: ktbl across.
R2: *k2tog, k4. Rep from * across(50sts)
R3: *k2tog, k3. Rep from * across(40sts)
Continue decreasing until 10 sts remain. Break yarn and pull through the loops left on the needles. Weave in ends.


Thursday, October 27, 2011

Your Second Scarf

Everyone makes a garter stitch scarf for their first project. (Well, almost everyone) This is the next step up from that. It includes 2 new stitches:


K2Tog:  Knit 2 stitches together
YO: Yarn over

These are 2 very easy stitches and if you need help try out Knittinghelp.com for awesome videos.

The Pattern:

CO 24sts
Rows 1-20: knit across
Row 21:  *YO, K2Tog. Repeat from * across

Repeat these rows until desired length ending on row 20. Bind off (BO) and weave in all ends.

Monday, June 6, 2011

Summer Lace Rib Bolero (Toddler)

Ok, I made the Ribbed Lace Bolero a while back and LOVE IT! This pattern is so fun too!

So, I decided for the reasons below, that it would be perfect for my toddler.

1. Its small and will fit in a diaper bag very easily.
2. Its light so she wont be too hot if it gets chilly.
3. It would be perfect to wear over tank tops so she doesn't get burnt little shoulders.

I also wanted to try a new type of lace, so I can keep learning as much as I can.

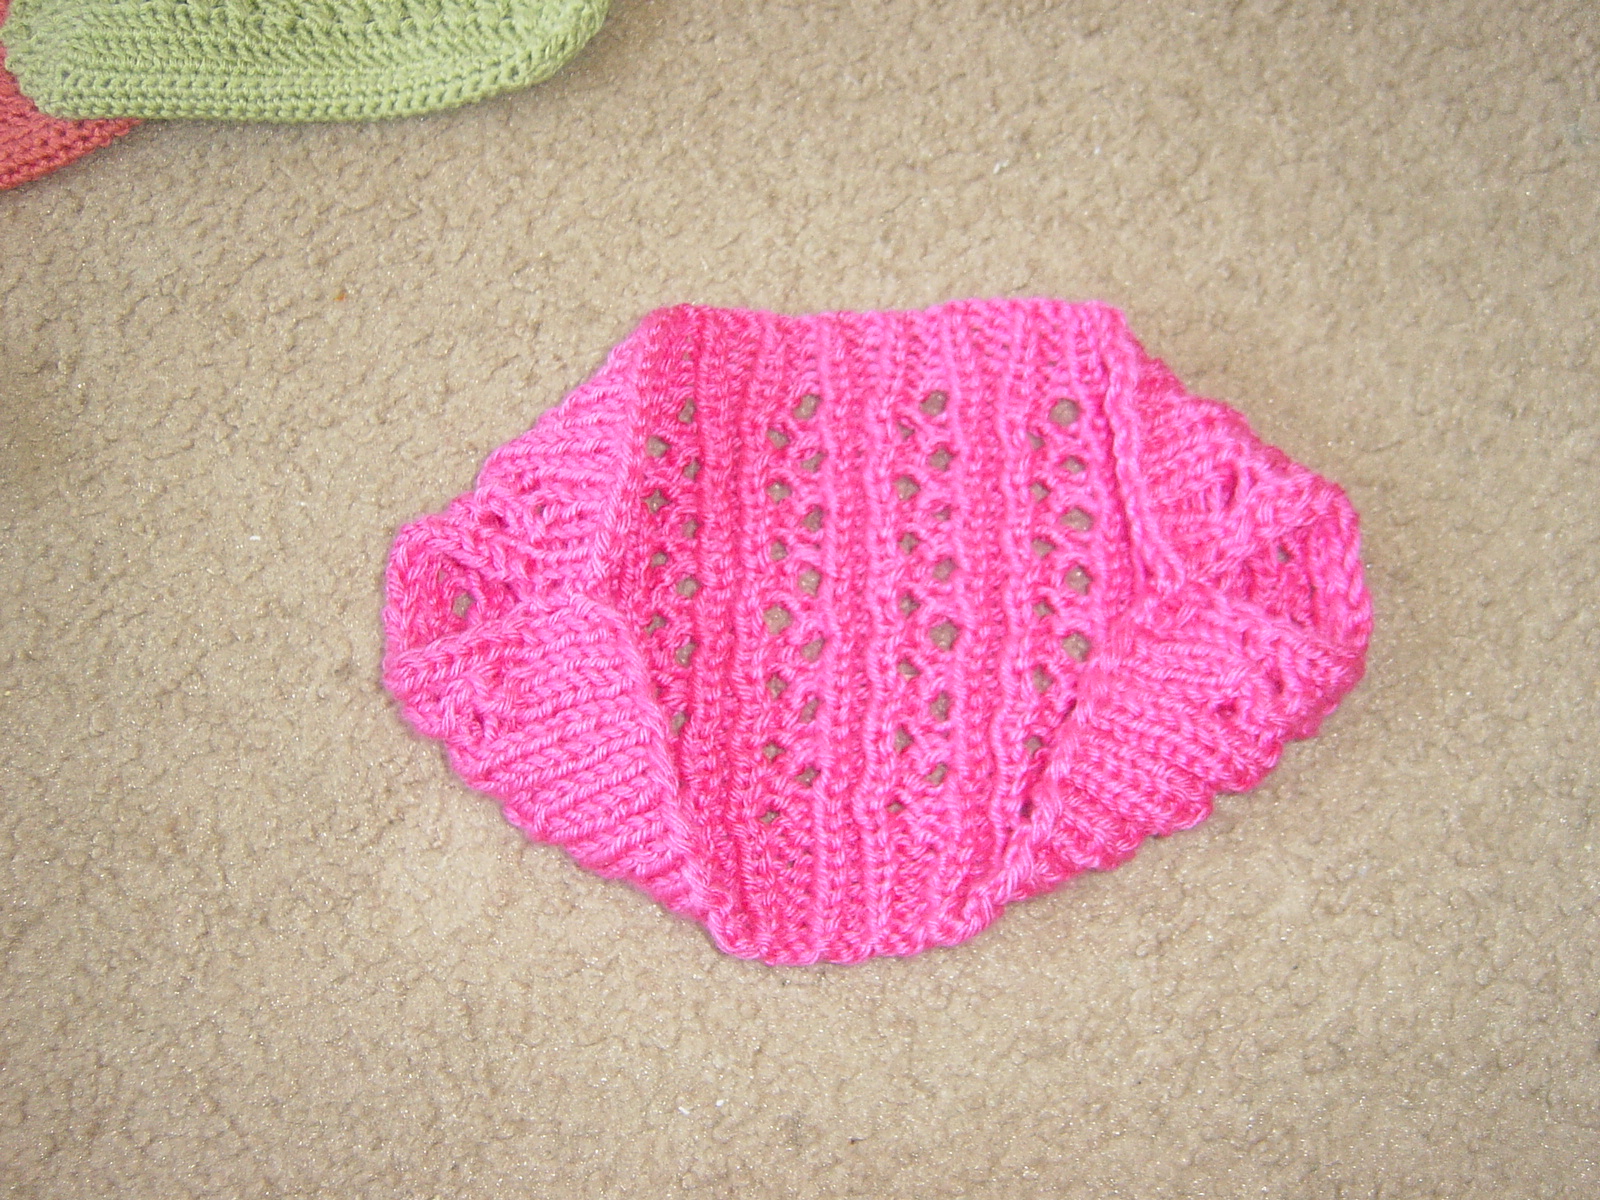
So, I took the general concept of this pattern and came up with my own for a toddler size!
With flash

without flash


Ok, so I used the original formula at first, and then I realized that toddlers are different from adults, so this is how I figured out my cast on and length.

I used Caron Simply Soft which is 18sts per 4" with size 8 needles.

Measuring: (everything in ( ) is an example for a 2T-3T toddler)
A. Measure across the back from shoulder to shoulder.  (11")
B. Look at your yarn label and divide the stitches by 4" and multiply by the width of the shoulders.(18sts/4"=4.5sts per inch)
C. Multiply the number you get from step B, by the number from step A. (11"*4.5sts=49.5sts)
D. calculate your cast on number by finding a  number close to your "C" number that is divisible by 6 +2.
This is your Cast on. (50sts)
E. Measure from the neck to mid back(5"-6") and add 3". This is the length. Take this number, minus the 3" and make sure it fits comfortably and loosely around the arm at/near the armpit. (8"-9")

And PLEASE send me any questions about this!

Pattern:  

**Remember that all toddlers are different sizes so you should measure first using steps A-E to figure out the size you should make.

Size 8 needles/Worsted weight yarn (I used simply soft)


 CO (50) sts, Your number from "D"
Set up rows:
Odd Rows(WS): * p2, k1 to end, p2
Even Row(RS)s: *k2, p1, to end, p2
Knit these two rows 3x each, end with a RS row. (half of the 3" listed above when figuring the length)

Start Lace Rib pattern on Wrong Side.
Knit lace rib for (5”) end with row 4. (7-8 repeats of the pattern)

Lace Rib
multiple of 6 +2
R1 & 3: *p2, k1 to end, p2
R2:               *k2, p1, yo, ssk, p1 to end, k2
R4:               *k2, p1, k2tog, yo, p1 to end. k2
   **Pattern: Repeat R1-4

Work Set up Rows again, starting with WS row, BO loosely.

Last step, Sew the ribbing from the top and bottom together to create the armholes. Make sure to leave enough room for arms, so dont sew it too small!
All finished!!

Tuesday, May 31, 2011

Green Summer Purse (crochet)


Yarn: Naturally Caron Spa (shown in "Green Sheen") less than 1 skein necessary
Hook: H
Extras: yarn needle


Ch: chain
Sc: single crochet
Dc: double crochet
Crdc: Crossed double crochet.
C2tog: crochet 2 together

Pattern:
Step 1: Ch 31
Step 2: 30 sc across, ch 1, turn
Step 3: repeat step 2 until there are 5 rows of sc
Step 4: sc around all 4 edges making 4 sc in each corner, join with slip stitch to create a perfect seam, ch2

Step 5: dc (1st round only: in back loop) of every sc around whole piece, join with slip stitch, ch 2
Step 6: dc in every dc around whole piece, join with slip stitch, ch 2
Step 7: crdc around whole piece, join with slip stitch, ch 2

Step 8: repeat steps 6 & 7 until desired length. (I did 5 repeats)End on step 6, join with slip stitch, ch 1 at the end.

Step 9: sc across decreasing 10 stitches evenly through next row with c2tog, join with slip stitch , ch 1.
Step 10: repeat step 9.
Step 11: sc3, ch25, skip 13 stitches, sc 11, ch25, skip 13 stitches, sc 8, join with slip stitch, ch1
Step 12: sc 3, sc 30 around chain stitches, sc 10, sc 30 stitches around chain stitches, sc 7, join with slip stitch, ch2.
Step 13: dc across, join with slip stitch. Break yarn, weave in ends.

Tuesday, May 17, 2011

Summer Purse (crochet)


When I think of summer, I think of crochet purses in bright colors. So, here's one of my own liking.


Yarn: Naturally Caron Country (shown in "Sunset")
Hook: H
Extras: 3 buttons, yarn needle


Ch: chain
Sc: single crochet
Dc: double crochet
Crdc: Crossed double crochet.

Step 1: Ch 31
Step 2: 30 sc across, ch 1, turn
Step 3: repeat step 2 until there are 5 rows of sc
Step 4: sc around all 4 edges making 4 sc in each corner, join with slip stitch to create a perfect seam, ch2

Step 5: dc (1st round only: in back loop) of every sc around whole piece, join with slip stitch, ch 2
Step 6: dc in every dc around whole piece, join with slip stitch, ch 2
Step 7: crdc around whole piece, join with slip stitch, ch 2
Step 8: dc in ever dc around whole piece, join with slip stitch, ch 1
Step 9: sc in every dc around whole piece, join with slip stitch, ch2

Step 10: repeat steps 5-7

Step 11: Dc in every other dc on "front" and "back" of piece. Dc in every dc on "sides".

Step 12: repeat steps 9, 5, 7.

Step 13: dc 18, chain 2, turn.
Step 14: repeat step 13 twice more.

Step 15: chain 4, join with slip stitch in next dc. Slip stitch over next 6 dc and chain 6, join with slip stitch in next dc, slip stitch over next 6 dc, ch 6 join with slip stitch in end.break yarn weave in.

Optional step: Pinch the side seams together to make the top of the bag more narrow. Make a "W" with the sides and sew through to hold in place.

Step 16: pick up yarn on top of side panel, ch 3 dc 3, ch3 turn, *dc3, ch3 turn. Until desired strap length and then join to other side panel.

Sew on buttons, weave in ends.

Monday, January 17, 2011

Aran French Press Cozy

 The Aran Press Cozy is knit in a soft aran weight cotton and helps keep your fingers from burning when pouring a nice cup of freshly pressed coffee. Dont you want your fingers to be happy!

This knits up in no time and is fun because you'll learn a new stitch! My braid stitch. (not the cable)

http://www.scribd.com/doc/98094056/Aran-Press-Cozy